If you'd asked me what I thought of backlighting your TV before I tried it myself, I would have said it's a silly gimmick that's a bit of fun but probably only something nerdy gamers would be into.
The funny thing is, I've been using a smart LED system to mirror my TV's lighting on the wall behind it for a while now and I love it so much, I miss it when watching other TVs.
What's more, guests often comment on my TV - they'll say stuff like, "That's a really nice TV." Now admittedly, I do have a pretty nice TV but I think the thing that really catches their attention - often without them even really understanding what it is - is the backlighting.
It basically takes the colours on screen and extends them out onto the wall beyond, creating a thoroughly immersive viewing experience most people seem to find quite captivating.
But it's not cheap; my system requires not just the lights but a W-Fi bridge to connect them to the internet and another box to run the HDMI signal through to create the mirroring effects. All up, the entire system costs over $1300.00, which is obviously completely bonkers. You could buy a whole new TV for that price.
However, it turns out there's more than one way to light up your life...

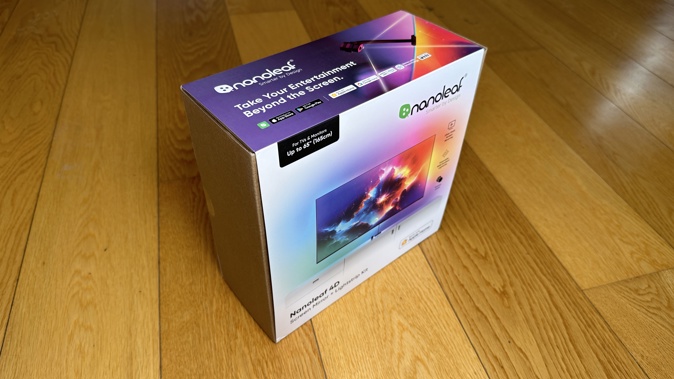
There are many remarkable talking points around the Nanoleaf 4D Screen Mirror + Lightstrip Kit but perhaps the most remarkable is the price; this basic starter box is only NZD$189.99.
This kit includes camera, mount, controller, corner brackets and a 4-metre long self adhesive lightstrip. That's long enough for any screen up to 65-inches and there's a longer option for larger displays up to 85-inches.

So right off the bat you might be wondering why there's a camera; this is what differentiates the Nanoleaf 4D system from other screen-mirroring lighting solutions. Rather than receiving a digital signal from whichever source is providing the images on screen, Nanoleaf 4D looks at what's on screen instead, then sends that information to the lightstrip.

This approach has both pros and cons - the most significant disadvantage is there's no denying having a camera mounted on an arm that protrudes from the top of your TV is a little distracting and certainly takes some getting used to. The mount itself is very well designed, providing a stable, non-permanent way to position the small, hexagonal camera module above the centre of your screen without actually obscuring any of it - even on screens with very narrow bezels. The cable from the camera tucks into a channel along the top of the mount to keep it tidily out of the way.
But if you find you just can't deal with the sight of camera and mount hovering above your telly, the base of the camera module also folds out so you can position it on a shelf below the screen instead, although after testing it both ways I found the above-screen setup works a bit better - more on that shortly.
Some people are funny about cameras. They worry about privacy and are paranoid baddies will somehow hijack their camera to... to... well, I don't know what they think is going to happen actually - especially given this particular camera isn't pointing at anything but your TV or monitor, doesn't record anything and isn't really connected to the internet. However, for extra peace-of-mind, Nanoleaf includes a magnetic privacy cover in the box.

But before you even install the camera, you'll probably want to start by attaching the lightstrip to the back of your TV - this is quite straight-forward; the strip has an adhesive backing and there are four corner mounts to help you keep it in place. The best thing to do is start in one of the bottom corners and work your way around the screen, finishing up back where you began. You can then trim off any excess length to keep things nice and tidy.

From there it's simply a matter of mounting the camera and plugging it, the lightstrip and the power supply into the small controller box. Once powered on, you can use the Nanoleaf app to continue setting up. This entails assigning the Nanoleaf 4D to a room, just like you would with any other Nanoleaf smart light, then a guided calibration process; firstly designating above or below camera position, secondly identifying exactly where on the lightstrip each corner is and lastly tracing the edge of your screen on an image captured by the camera. This last step is crucial because as the camera is mounted so close to the screen, its wide-angle view of things is quite fish-eyed and warped.
When I tried the below-screen position for the camera, at first I couldn't figure out why I kept getting bright red colours reflected on the wall when there wasn't any red action on-screen. Eventually I realised the camera was picking up my TV's power LED situated at bottom right-hand corner of the screen - not an issue when the camera was mounted at the top.
Once everything is set up you can then activate the Nanoleaf 4D using the controller box, the Nanoleaf app or even using voice commands via Siri, Alexa, Bixby or Google Assistant. I tended to use the app on my phone given I was usually sitting across the room on my couch.
Like other Nanoleaf lights, this lightstrip can be set to any static colour and brightness of your choice. It can display dynamic, changing "scenes" - either from a selection of preset options or you can design your own. There's even a new feature called Magic Scene, where you type in a word or phrase - perhaps "birthday" or "mellow afternoon" and Nanoleaf will come up with a unique scene to match.
The Rhythm Music Visualizer is also on offer. This means the lightstrip will react in time to music or voices - great fun for a karaoke night.
But the main event is, of course, the 4D screen mirroring.
The 4Ds refer to four different levels of intensity - 1D = a very basic backlighting effect. 2D = still subtle but slightly more animated in relation to the action on screen. 3D = a much more accurate mirroring effect, closely matching the colours being played. 4D = an exaggerated, over-the-top, hyper-colourful effect.
I found I preferred the 3D setting, for a realistic enhancement of my TV, movie and sports viewing with 4D perhaps more suited to gaming. Even once you've selected a "D" you can customise things further - choosing between the slightly muted Cinematic setting or the more eye-popping but sometimes distracting Vivid mode.
At that point you can dive even deeper into the customisations, really fine-tuning the brightness and intensity of the colours.
And the result is pretty good. As I said - I found the 3D, Cinematic setting provided the most accurate mirroring experience - extending the green of sports pitches across my wall and making explosions seem like they were happening in my living room.
In all honesty, no amount of recalibration and settings-tweaks achieved quite the same mirroring effect of my previous lighting system but remember; that one costs more than a thousand dollars more and it definitely isn't a thousand dollars better.
What's more, Nanoleaf 4D has a distinct advantage over that other, HDMI-based system. My previous system only worked with external devices like streaming boxes and gaming consoles. Because the signal had to be received via HDMI cable, there was no way to use it with the native, built-in apps on my TV.
On the other hand, the Nanoleaf 4D camera simply mirrors anything playing on screen - from live TV to video games, making it much more versatile.
That versatility follows through to its ability to integrate with other Nanoleaf lights via the Sync+ function. This means you're not just limited to mirroring using the included lightstrip but you can expand the effect across other devices like Nanoleaf Lines and Shapes. I've had a bit of a play around with this feature but with limited success so far. As I discovered with my previous review of Nanoleaf's Matter-Over-Thread devices, getting multiple lights to play well with each other is often problematic and it's possible future firmware updates will smooth this process out a bit.
I've decided for now the best way to use Nanoleaf is set it and forget it - once it's working the way I want it to it works that way consistently, every time I turn on my TV. You won't find a more effective backlight mirroring system for the price.
Click here for more information and pricing on the Nanoleaf 4D Screen Mirror + Lightstrip Kit.
Take your Radio, Podcasts and Music with you